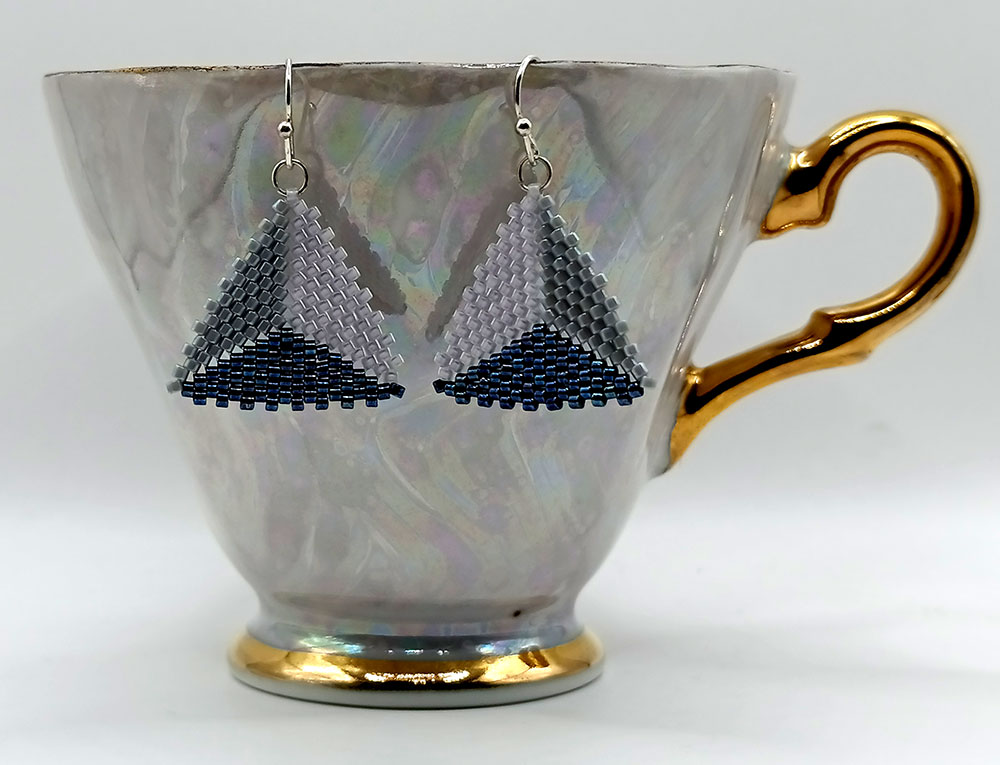
I’m excited to share my love for peyote stitch. It’s a bead weaving technique that’s both fun and rewarding. This guide is for beginners and experienced beaders alike. It covers flat peyote, even count, and odd count stitches.

My adventure with peyote stitch started years ago. I’ve been amazed by its endless possibilities. From delicate bracelets to intricate amulet bags, it’s an ancient technique that’s still loved today. In this guide, I’ll show you how to make beautiful jewelry and crafts using flat peyote stitch in even and odd counts.
Key Takeaways
- Peyote stitch is a versatile bead weaving technique
- Flat peyote comes in even and odd count variations
- Learn to create stunning jewelry and crafts
- Master the basics of peyote stitch patterns
- Explore the rich history and cultural significance of peyote stitching
Introduction to Peyote Stitch: A Bead Weaving Essential
Peyote stitch beading is a captivating technique that has enchanted beadwork enthusiasts for generations. As I delve into this fascinating world of seed beads and intricate patterns, I’m excited to share the magic of this versatile stitch with you.
What is Peyote Stitch?
Peyote stitch is a beading technique that creates a distinctive zigzag pattern. It involves weaving seed beads in a way that each new bead sits atop the gap between two beads from the previous row. This method results in a texture reminiscent of brick walls, offering endless possibilities for jewelry and beading projects.
History and Cultural Significance
The peyote stitch has deep roots in Native American cultures. Traditionally used in ceremonial objects and personal adornments, it has since evolved into a beloved technique in contemporary beadwork. The stitch’s name originates from its use in decorating objects associated with peyote ceremonies.
Why Learn Peyote Stitch?
Learning peyote stitch opens up a world of creative possibilities. It’s versatile enough for crafting intricate jewelry pieces, decorative objects, and even three-dimensional sculptures. As a beginner, I found that mastering this stitch not only improved my beading skills but also allowed me to express my creativity in new and exciting ways.
“Peyote stitch is like a meditative journey through beads, where each stitch brings you closer to a beautiful creation.”
Whether you’re new to beadwork or an experienced crafter, peyote stitch is a technique worth exploring. Its rhythmic nature makes it soothing to work with, while its versatility ensures that your creativity knows no bounds. Join me as we dive deeper into the world of peyote stitch beading!
Understanding the Basics: Flat Peyote Stitch Fundamentals
I love sharing the magic of flat peyote stitch with fellow beading enthusiasts. This versatile technique forms the backbone of many stunning beadwork projects. Let’s dive into the essentials!
Flat peyote stitch creates a beautiful, textured surface using rows of offset beads. It’s worked with a needle and thread, adding one bead at a time. The pattern alternates between even-count peyote and odd-count peyote stitch, each with its unique characteristics.
To start, I string a base row of beads. For even-count peyote, I use an even number of beads. Odd-count peyote begins with an odd number. The magic happens in the second row, where I add beads between the existing ones, creating that signature peyote texture.
- Even-count peyote: Easier for beginners, ends with the same number of beads per row
- Odd-count peyote: Slightly trickier, but allows for centered designs
As I work, I maintain tension by pulling the thread snug after each stitch. This ensures a tight, professional-looking finish. With practice, the rhythmic process becomes almost meditative.
“Peyote stitch is like painting with beads – each stitch builds a beautiful picture.”
Mastering flat peyote stitch opens up a world of creative possibilities. From simple bracelets to intricate tapestries, this technique is a true beading essential.
Even Count Peyote Stitch: Mastering the Technique
I love working with even count peyote stitch. It’s a versatile technique that creates beautiful, uniform patterns. Let’s dive into the steps to master this popular beading method.
Setting Up Your First Row
Starting an even count peyote stitch project begins with creating a strong foundation. I always thread my needle with about an arm’s length of beading thread. Then, I pick up an even number of beads for my first row of peyote stitch. This initial row determines the width of my project.

Working the Stitch Pattern
Once I’ve set up my first row, I’m ready to start the actual stitching. I pick up a new bead and skip the last bead of the previous row. Then, I pass my needle through the next bead. This creates a zigzag pattern that’s characteristic of peyote stitch.
I repeat this process, picking up a new bead and skipping one, until I reach the end of the row. The key is maintaining consistent tension throughout. This ensures my work stays even and looks professional.
Finishing Off Even Count Projects
As I near the end of my project, I pay extra attention to my tension. The last few rows can make or break the overall look. Once I’ve reached my desired length, I weave in my thread ends securely. This prevents any loose beads and gives my piece a polished finish.
| Step | Action | Tip |
|---|---|---|
| 1 | Thread needle | Use arm’s length of thread |
| 2 | Pick up even number of beads | Determines project width |
| 3 | Add new bead, skip one | Creates zigzag pattern |
| 4 | Maintain tension | Ensures even rows |
| 5 | Weave in ends | Secures work, polished finish |
Odd Count Peyote Stitch: Tackling the Challenges
Odd count peyote stitch can be tricky, but it’s worth mastering. It uses an odd number of beads in each row, making the end tricky. Let’s dive into the specifics and learn how to conquer this technique.
The key difference in odd count peyote stitch is the turn at the end of each row. Unlike even count, where you simply move to the next bead, odd count requires a special maneuver. Here’s how I handle it:
- Add a bead to your needle
- Skip the last bead of the previous row
- Pass through the second-to-last bead
- Pull tight and begin the next row
This turn can feel awkward at first, but with practice, it becomes second nature. The odd number of beads creates a zigzag edge, which can be both a challenge and a design feature.
“Odd count peyote stitch opens up a world of design possibilities. Embrace the unique edge it creates!”
To maintain an even edge in odd count peyote stitch, I focus on consistent tension. It’s crucial to pull each bead snug, especially when turning at the row’s end. This helps prevent gaps and keeps your work looking professional.
| Aspect | Even Count | Odd Count |
|---|---|---|
| Number of beads per row | Even | Odd |
| Edge pattern | Straight | Zigzag |
| Turn at row end | Simple | Complex |
With these tips, you’ll be well-equipped to tackle the challenges of odd count peyote stitch. Remember, practice makes perfect!
Tools and Materials for Successful Peyote Stitching
I’m excited to share the essential tools and materials you’ll need for peyote stitching. Let’s dive into the world of beads, threads, and needles that will bring your projects to life!

Miyuki delica beads are perfect for peyote stitch. They have a uniform shape and size. Size 11 seed beads are also popular for their versatility. These tiny treasures come in a rainbow of colors, allowing endless creative possibilities.
Beading threads are crucial for holding your creation together. I prefer nylon threads for their strength and flexibility. They come in various thicknesses, so choose one that suits your project and bead size.
A good beading needle is indispensable. Look for thin, flexible needles that can pass through your beads multiple times. I find that needles with a collapsible eye are particularly useful for peyote stitch work.
| Tool/Material | Recommended Type | Why It’s Important |
|---|---|---|
| Beads | Miyuki delica beads, Size 11 seed beads | Uniform shape, wide color range |
| Thread | Nylon beading threads | Strong, flexible, durable |
| Needle | Thin beading needle with collapsible eye | Easy threading, fits through beads multiple times |
With these tools and materials, you’re ready to embark on your peyote stitch journey. Remember, quality supplies make a big difference in your final product, so invest in the best you can afford.
Peyote Stitch Variations: Beyond the Basics
I found out that peyote stitch is way more versatile than I thought. Exploring this technique, I discovered cool variations that opened up new creative doors.
The two-drop peyote stitch is now a top pick for me. It lets me work faster and make stunning patterns. By picking up two beads at once, I create striking designs easily.
Tubular peyote stitch took my beadwork to a whole new level. I was excited to make seamless, three-dimensional shapes. These are great for beaded beads, rope covers, and small containers. The cylindrical shape opens up endless possibilities for unique jewelry and decorations.
“Freeform peyote unleashed my creativity in ways I never imagined possible.”
Freeform peyote really let my creativity shine. This method lets me mix different bead sizes, shapes, and colors freely. I love how each piece is a unique work of art, showing my mood and vision.
- Two-drop peyote: Quick and visually striking
- Tubular peyote: Perfect for 3D creations
- Freeform peyote: Unleash your artistic expression
These variations have changed my beadwork, letting me explore new ideas. Whether you want to speed up your work, add depth, or express yourself freely, these techniques are exciting to try.
Troubleshooting Common Peyote Stitch Issues
I’ve faced many challenges while learning peyote stitch. Let’s look at common problems and how to solve them. This will help you make perfect projects.
Uneven tension is a big problem for beginners. To solve this, keep the thread pressure steady as you stitch. The more you practice, the better you’ll get. If you see uneven spots, just adjust the beads with your needle or fingers.
Fixing mistakes in peyote stitch can be hard. If you find an error, carefully undo the stitches up to that point. Using fine-tipped tweezers helps remove beads without harming your work.
Turning rows can be tough for new stitchers. To make it easier, use a big bead at the end of each row as a marker. This makes it simpler to know where to start the next row.
| Issue | Cause | Solution |
|---|---|---|
| Uneven tension | Inconsistent thread pressure | Maintain steady tension, adjust beads as needed |
| Mistakes in pattern | Misplaced beads or wrong colors | Carefully undo stitches, use tweezers to remove beads |
| Difficulty turning rows | Losing track of row ends | Use larger beads as row markers |
Remember, patience is key when fixing peyote stitch problems. With practice, these issues will get easier. This will lead to beautiful, professional-looking creations.
Creating Your First Peyote Stitch Bracelet
I’m excited to guide you through making your first peyote stitch bracelet! We’ll use the flat even count peyote stitch we’ve learned. This project brings together all the techniques we’ve covered, letting you create a beautiful piece of wearable art.
Start by choosing your favorite beads and thread. Remember to pick a comfortable length for your wrist. As you weave, keep your tension even for a smooth finish. The flat even count peyote stitch will create a flexible, ribbon-like band that’s perfect for a bracelet.
When you reach your desired length, it’s time to add a clasp. There are many options, from simple toggle clasps to more intricate designs. Attach it securely, weaving the thread through multiple times for strength. With practice, your peyote stitch bracelets will become more complex and stunning!
FAQ
What is the best way to learn peyote stitch?
Start with a beginner’s tutorial or class to learn peyote stitch. Practice the basic flat peyote technique until you feel confident. Then, try even count and odd count peyote for more challenges.
How do I maintain even tension in my peyote stitch projects?
Even tension is key for uniform peyote stitch pieces. Start with a comfortable tension and adjust as needed. Good lighting and breaks help avoid hand fatigue and uneven tension.
What are the best types of beads for peyote stitch?
Cylinder beads, like Miyuki Delica beads, are great for peyote stitch. They have a uniform shape and size for even rows. Traditional seed beads, especially size 11 or smaller, add a textured look.
How do I properly add a clasp to my peyote stitch bracelet?
Adding a clasp to a peyote stitch bracelet can be tricky. Create a small loop or beaded section at each end for the clasp. Reinforce the ends with a knot or thread path to prevent unraveling.
How do I fix mistakes in peyote stitch?
Fixing mistakes in peyote stitch can be tough, but doable. If you spot a mistake early, unravel back to the error and re-stitch. For bigger mistakes, you might need to remove rows or start over. Patience and practice are crucial.