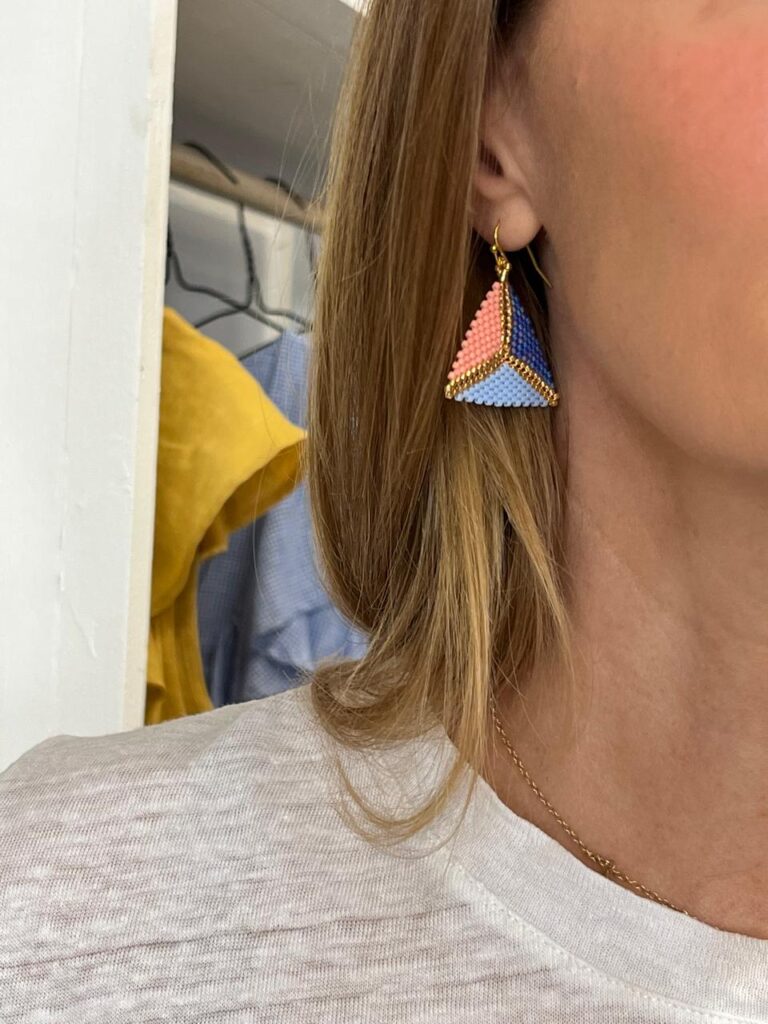
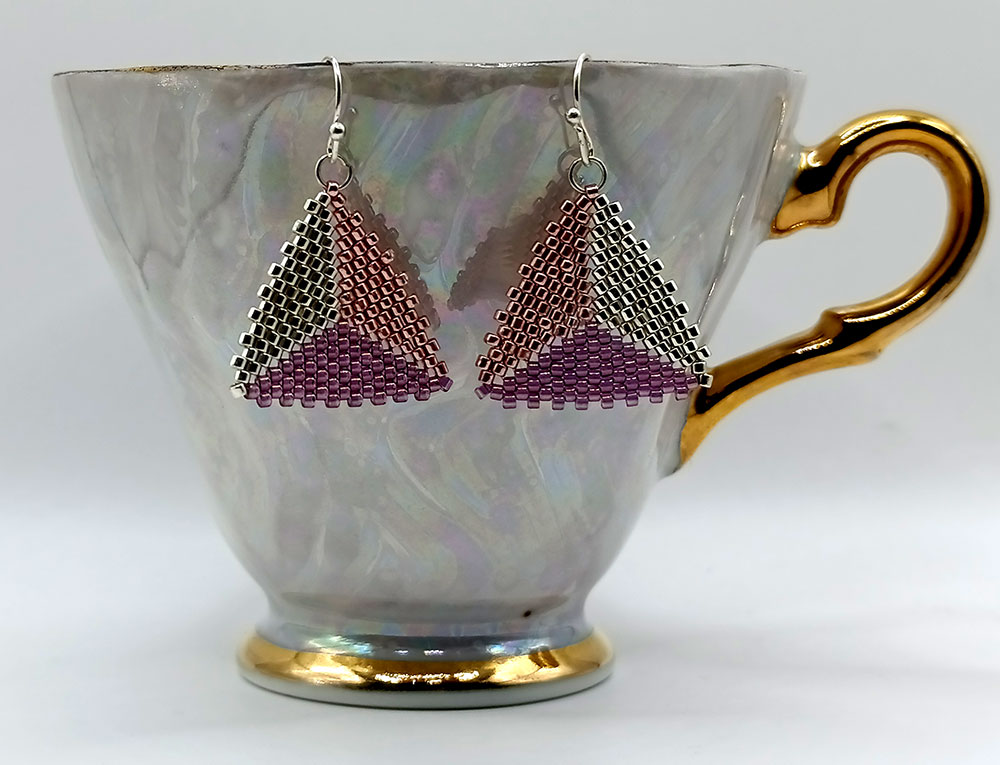
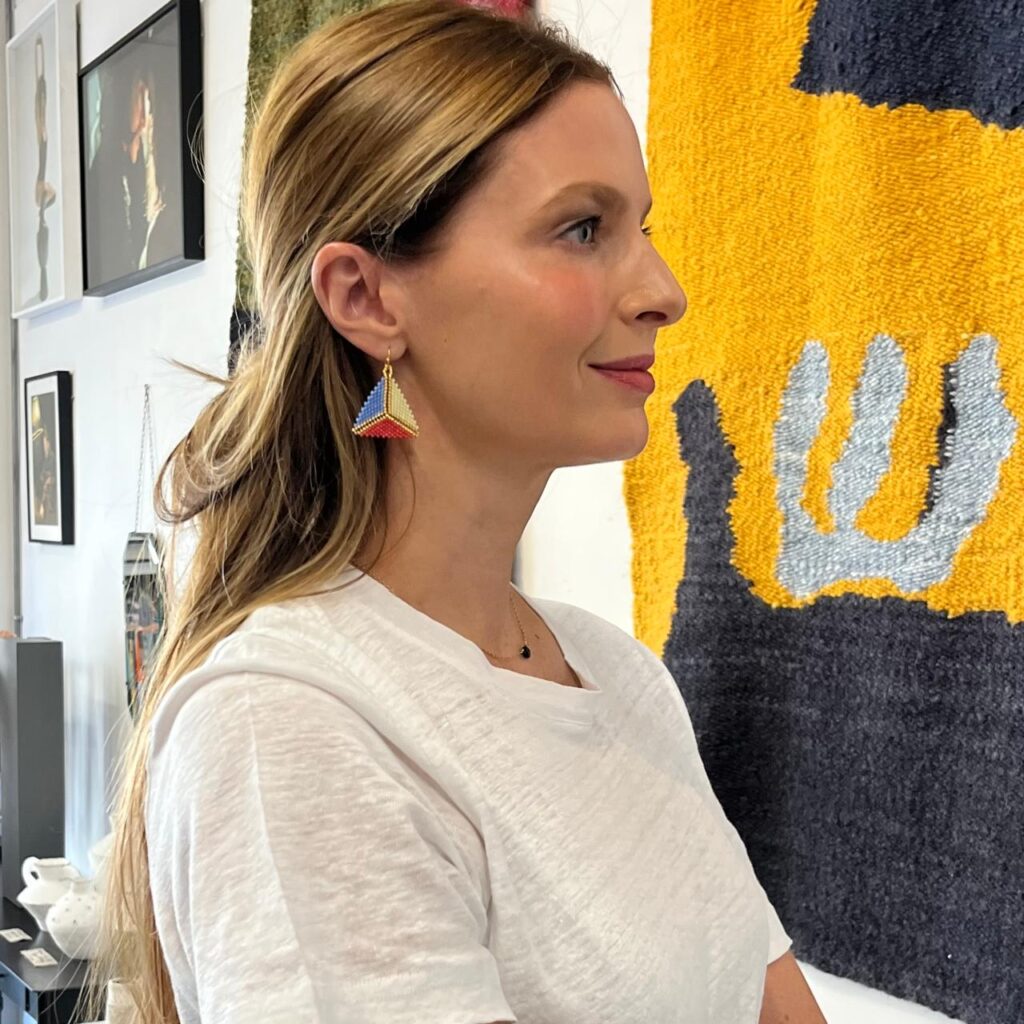
Explore the fascinating world of bead weaving with our guide on the Peyote stitch triangle. This beginner’s tutorial will teach you the key techniques for making beautiful jewellery with seed beads.
The Peyote stitch is loved for its flexibility and beauty in both three-dimensional and flat designs. Learning this stitch lets you make many different items, adding a unique touch to your work.
In this guide, we’ll cover the basics, show you how to weave patterns, help with common problems, introduce advanced techniques, and share tips for keeping your beadwork in top shape. Our goal is to give beginners the skills and confidence to create stunning Peyote stitch triangles.

Key Takeaways
- Introduction to the versatile Peyote stitch for bead weaving.
- Essential materials and tools needed for your projects.
- Step-by-step instructions for mastering basic and advanced techniques.
- Various patterns and designs you can create.
- Troubleshooting tips for common beading issues.
- Maintenance advice to ensure the longevity of your beadwork.
Introduction to the Peyote Stitch
The peyote stitch is a unique bead weaving method loved by many. It’s known for its texture and versatility. It’s used in everything from simple bracelets to complex designs.
This stitch is special because it can make flat, tubular, and even three-dimensional shapes. This freedom lets artists be very creative with their work.
What is the Peyote Stitch?
The peyote stitch is a favourite among beaders. It’s easy to learn and looks amazing. You weave the needle and beading thread through rows of seed beads.
This creates a strong, flexible fabric. The staggered pattern adds beauty and strength to the piece.
Materials Needed
To start with the peyote stitch, you need some basic things. Here’s what you’ll need:
- Seed Beads: You can find them in different sizes and shapes. Brands like Miyuki and Toho are known for their quality. Delica beads are great for a precise look.
- Beading Thread: Use strong thread like FireLine or Nymo. It should be thin enough to go through small beads easily.
- Needles: You’ll need fine, flexible needles for beadwork. They help you get through small bead holes.
- Additional Tools: Scissors, bead mats, and trays can make your work easier.
Using good materials makes your beadwork last longer and look better. Choose well-known brands for the best results.
Getting Started with a Peyote Stitch Triangle
Starting your peyote stitch triangle journey is both thrilling and a bit scary. Learning the basics will make creating a peyote triangle easy. We’ll show you how to start your first row and build a strong base for your design.

Basic Techniques
First, learn the key techniques for your peyote triangle. It’s important to control tension, whether you’re using thread or beading wire. This ensures your rows are even and your triangle is balanced. Here’s how to begin:
- Choose your beads and thread carefully to fit your triangle’s style.
- Start by threading a stop bead, leaving a 6-inch tail for finishing later.
- Then, string the first two rows of beads. These rows set the pattern for the rest.
Starting Your First Row
The first row is crucial for setting your pattern. Start with the longest row to keep things symmetrical:
- String an even number of beads for the foundation row.
- Add one bead, skip the last bead of the previous row, and go through the next one.
- Keep adding and stitching beads until you finish the row.
Starting with the longest row helps avoid confusion and keeps your triangle balanced. Properly aligning your beads and keeping tension consistent will give you a solid and beautiful base for your design.
| Step | Description |
|---|---|
| Initial Beadwork | Thread a stop bead, string the first two rows. |
| Longest Row First | String an even number of beads to start the first row. |
| Repeat Stitching | Add and stitch beads across the row. |
| Maintaining Tension | Ensure consistent tension for structural integrity. |
Mastering these basics will help you create stunning peyote stitch triangles. Keep practicing to improve your skills and make your beadwork even better.
How to Weave Different Patterns
Creating stunning designs with peyote stitch patterns is an exciting journey. By mastering a few techniques, you can weave intricate geometric patterns. You can also experiment with colours to bring your beadwork to life.
Creating Geometric Patterns
To start creating geometric patterns, it’s essential to understand the basics of increasing and decreasing beads. This process allows you to form triangles, diamonds, and more complex shapes. Begin by adding beads at the end of each row to expand and taper your beadwork gradually.
These adjustments can be made at regular intervals to generate uniform angles and edges. Whether you’re working on a symmetrical design or experimenting with organic shapes, pay close attention to your bead selection and placement. These small choices significantly impact the final pattern.
Incorporating Colours
When incorporating colours into your peyote stitch patterns, planning ahead is crucial. Use a beading graph paper to sketch your design, deciding on the colour sequence before starting. This proactive approach ensures a cohesive look and makes producing complex patterns more manageable.
Consider using contrasting colours to highlight your geometric patterns or blending hues for a subtle, sophisticated effect. The placement of each bead along the design can create visual depth and intrigue. Choose your palette thoughtfully. By combining vibrant tones with neutral ones, you can achieve striking results.
Troubleshooting Common Issues
Running into challenges is normal when learning the Peyote Stitch Triangle. But knowing how to troubleshoot them can make your beading easier.
Uneven tension is a common problem. It can make your beads misaligned. To fix this, pull the beading thread tight after each bead. If it’s uneven, adjust it with a needle to keep it even.
Another issue is tangled beading thread. To stop this, use beeswax or thread conditioner on your thread. If it still tangles, untangle it slowly to avoid more knots. Keeping your thread tight and unwinding it often can also help.

Misaligned beads can also happen. To prevent this, follow your pattern closely and check your work often. If you make a mistake, use a needle to fix it without having to redo a lot of work.
Finally, it’s important to knot your beading thread well at the start and end. If a knot forms in the middle, untie it right away to stop it from getting tighter.
| Issue | Solution |
|---|---|
| Uneven Tension | Adjust bead tension with a needle regularly |
| Tangled Thread | Condition thread and untwist gently |
| Misaligned Beads | Double-check pattern alignment often |
| Knot in Thread | Untie immediately to avoid further tightening |
By spotting these beading issues early and using these tips, you’ll keep your beadwork looking great.
Peyote Stitch Triangle Projects
Starting with Peyote stitch triangle projects opens up a world of creativity. You can make earrings or intricate beaded necklaces. The versatility of peyote stitch triangles brings your beadwork to life.
Making Earrings
Beginners can start with simple peyote stitch triangle earrings. Here’s a tutorial:
- Thread a needle with thread and string three beads for the initial triangle.
- Sew through the first bead again to close the loop.
- Add a bead to the needle and pass through the next bead, ensuring it fits snugly.
- Keep adding beads until the triangle is complete.
- Secure the thread by weaving it back through the beads and tying a knot.
- Attach earring hooks to the top using jump rings or wire.
You can customise this basic earring design with different colours or extra beads.
Beaded Necklaces
Peyote stitch triangles can also make complex pieces, like beaded necklaces. Here are some ideas:
- Pendant Style: Use a single triangle as a striking pendant, hung from a chain or beaded strand.
- Collar Design: Mix multiple triangles for a bold collar necklace that falls elegantly across the collarbone.
- Bead Embellishments: Add fringe or more beadwork to the edges of each triangle for a detailed look.
Trying different designs makes your beadwork unique and personal. The secret to mastering peyote stitch triangle projects is practice and creativity. Let your imagination turn simple patterns into beautiful jewellery.
Advanced Techniques for Peyote Stitch Triangle
Explore advanced techniques to take your peyote stitch triangle projects to the next level. You can create a stunning twisted rope necklace or add detailed bead embellishments. These methods will help you make professional-quality designs.
Twisted Rope Necklace
A twisted rope necklace adds a sophisticated touch to your collection. It beautifully incorporates the peyote stitch triangle. Here’s how to make it:
- Start by making several small peyote stitch triangles.
- Connect these triangles to form a continuous pattern. Use twisted rope segments to secure each triangle.
- Twist the rope gently to get the look you want.
- Finish the necklace with a clasp or artisan duck.
Bead Embellishments
Adding bead embellishments can turn a simple peyote stitch triangle into a masterpiece. Here’s how to add embellishments:
- Pick beads that match or contrast your triangle for a striking look.
- Weave extra beads around the edge of your triangle.
- Try different sizes and colours to add texture and depth.
- Make sure the new beads are well attached to keep the design strong.
Using these advanced techniques, you can create stunning pieces that show off your skill and creativity in peyote stitch jewellery making.
Maintaining Your Beadwork
Looking after your beadwork is key to keeping it beautiful and lasting long. Using the right cleaning tips and knowing how to knot and repair is crucial. This way, your beadwork will stay in top shape for years.
Cleaning Tips
Keeping your beadwork clean is vital. Never use harsh cleaners that can harm the beads. Instead, use a soft cloth with mild soap and water to clean it gently.
For beads made of glass or metal, a soft toothbrush can help get rid of dirt in tight spots.
- Avoid submerging beadwork in water, especially if it’s attached to fabric or leather.
- Use gentle, non-abrasive detergents.
- Make sure beads are dry before storing to stop mildew.
Knotting and Repair
Knowing how to knot and repair is essential for keeping your beadwork in good shape. Regularly check for loose threads or damaged beads. This way, you can fix small problems before they get worse.
- Securing loose threads: Use a strong thread to re-tie any loose knots.
- Replacing damaged beads: Remove the broken bead and thread a new one. Make sure the knot is tight and secure.
Spending a little time on maintaining beadwork can greatly improve its lifespan. Regular checks and quick repairs will keep your peyote stitch triangle beadwork looking perfect for many years.
Learning from Experts
If you love beading, meeting beading experts is super helpful. Joining bead weaving workshops or local groups lets you learn new skills. You’ll get one-on-one help from experts in geometric beadwork.
Signing up for a newsletter from famous bead artists keeps you in the loop. You’ll get new ideas, tutorials, and special projects. Plus, following them on social media gives you daily creativity boosts.
Being part of the beading community is great too. Through bead weaving workshops or online forums, you can share ideas and get advice. Many groups host events, both online and in-person, which are very rewarding.
To catch all the good stuff, make sure to follow us on social media and subscribe to our newsletter. We’ll send you updates and inspiration regularly.
- Join local and online bead weaving workshops.
- Subscribe to a newsletter from esteemed beading professionals.
- Follow us and other adept artisans on social media.
- Participate in beading forums and community events.
“The best way to master any craft is to learn from the experts who have spent years honing their skills.”
By staying connected and learning from beading experts, you’ll get better at geometric beadwork. You’ll also join a lively and supportive community.
Conclusion
Starting your bead weaving journey with the Peyote Stitch Triangle opens a world of intricate designs. This guide aimed to teach you the peyote stitch basics and how to make unique geometric patterns. Now, you should feel ready to create your own peyote pieces, improving your skills and adding to your handcrafted jewellery collection.
We’ve looked at various aspects, from solving common problems to advancing your techniques. Learning a new skill is rewarding, especially when it lets you make beautiful, personal items. The peyote stitch is versatile, perfect for making elegant earrings or intricate necklaces.
As you get better, try more complex designs and projects. Experiment with new patterns, colours, and bead embellishments to keep your creativity flowing. Looking into a beaded bezel tutorial or advanced peyote stitch techniques can deepen your knowledge and skills. The world of beadwork is vast, full of chances for learning and expressing yourself creatively.
Mastering the peyote stitch lets you create stunning jewellery and feel a great sense of achievement. This craft welcomes everyone, from beginners to experienced artists, offering endless possibilities for fun and making professional-quality pieces. Your bead weaving journey is just starting, and with each project, you’ll get closer to becoming an expert in this timeless art.
FAQ
What is the Peyote Stitch?
The peyote stitch is a bead weaving method. It’s known for its flexibility and texture. You can make flat or three-dimensional designs with it, making it popular among jewellery makers.
What materials do I need to start a peyote stitch triangle?
You’ll need size 11 seed beads or delica beads, a strong beading thread, and beading needles. Don’t forget scissors. A bead mat and thread conditioner can also be useful.
How do I begin the first row in a peyote stitch triangle?
Start by threading your needle and picking up two beads. Knot the tail thread as you go. Then, alternate between picking up one bead and passing through the previous one. This sets up the triangle’s base.
What are some basic techniques I should know?
You should know how to manage thread tension and align beads properly. Also, learn to weave in new threads. These skills help keep your pattern stable and consistent.
How can I incorporate different colours in my design?
Plan your pattern and lay out the beads first. Use contrasting and complementary colours to make your design stand out.
What should I do if I face common beading issues?
If you have uneven tension or misaligned beads, remove a few beads and start again. Make sure your thread is conditioned and knots are secure. This prevents tangling and keeps your weave clean.
Are there any advanced techniques for peyote stitch triangles?
Yes, you can try techniques like making a twisted rope necklace. Or add bead embellishments for texture and dimension. These add complexity and beauty to your beadwork.
How do I maintain and clean my beadwork?
Clean your beadwork regularly with a soft cloth and gentle detergents. Secure knots are key to keeping it in good shape. For repairs, weave the new thread into existing stitches to fix small damages.
Where can I learn more from beading experts?
You can learn by joining workshops, online courses, or community groups. Subscribing to newsletters and following artisans on social media also offers inspiration and tips.
