The Flat Cellini Spiral Stitch is loved by jewellery makers all over the world. It comes from the skilled hands of South African beaders. This stitch turns simple bead patterns into beautiful pieces of art.
It’s great for both newbies and experts. The flat cellini spiral stitch lets you create unique designs that fit many styles.
This stitch celebrates South African craftsmanship. It shows how simple materials can make magical accessories. If you want to improve your beading skills or start making handcrafted jewellery, this stitch is a great place to begin.

Key Takeaways
- The flat cellini spiral stitch is a fundamental yet elaborate beading technique that enables the creation of personalised jewellery pieces.
- This stitch is deeply rooted in South African beading culture, highlighting the nation’s contribution to the art of jewellery making.
- Its simplicity makes it an ideal choice for those new to beading, whilst offering complexity for experienced beaders seeking a challenge.
- Flat cellini spiral stitch can innovate simple bead patterns into sophisticated designs, allowing for a wide range of creative expression.
- With its versatility, this stitch technique is a valuable skill for anyone interested in the craft of jewellery design and creation.
Understanding the Basics of Flat Cellini Spiral Stitch
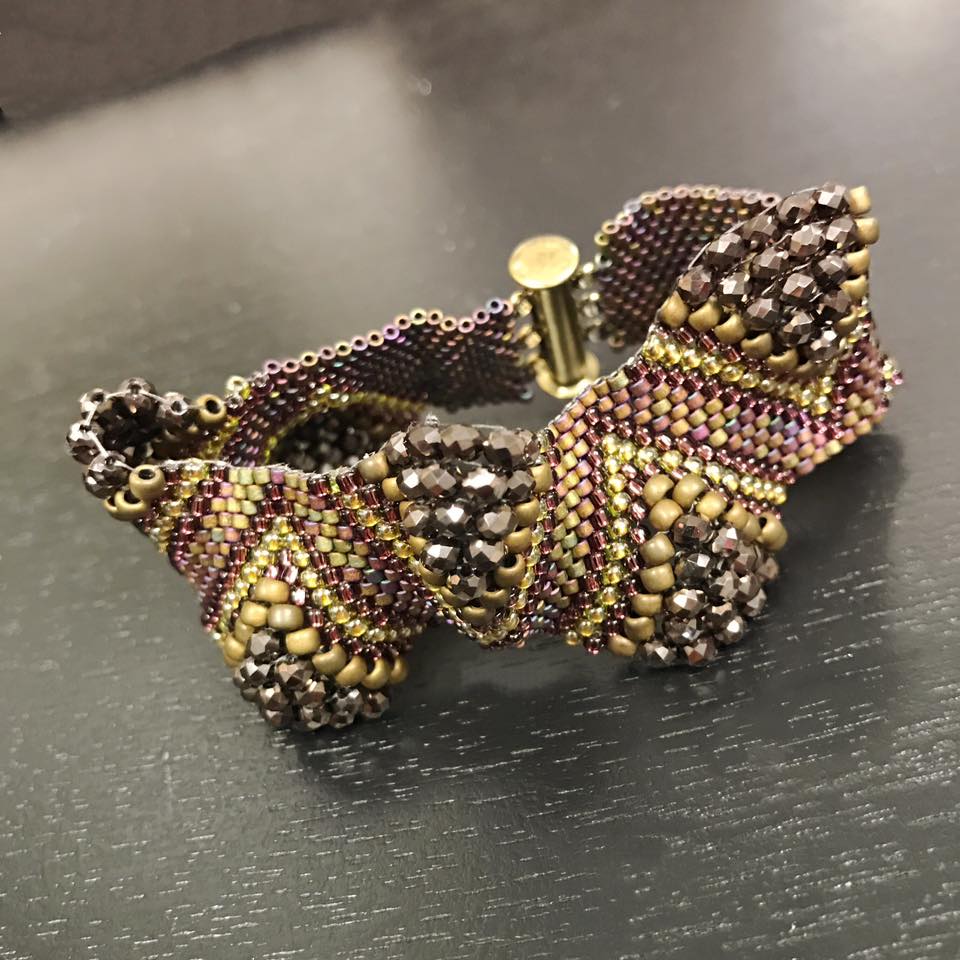
The Flat Cellini Spiral Stitch is a unique twist on the basic spiral stitch. It uses seed beads of different sizes to create a textured look. This method is great for making detailed bracelet designs and is loved by many beading fans for its ability to create unique pattern effects.
This stitch gives a special ornate look, perfect for eye-catching bracelet pieces. It works by changing bead sizes, creating a beautiful helix pattern. This pattern is both touchable and visually stunning.
Learning this stitch requires understanding the bead sequence and sizes. At first, it might seem tricky. But with practice and a good tutorial, beginners find it fun and rewarding.
- The flat cellini spiral starts with a key foundation row.
- As you build the piece, add beads in a specific order. This keeps the stitch flat and creates the spiral effect.
- Changing colours can make the spiral’s depth stand out, adding to the bracelet‘s beauty.
For those wanting to try this technique, many tutorials and resources are out there. They offer step-by-step guides and diagrams. These tools are key for mastering the flat cellini spiral stitch and making stunning bracelet and jewelry pieces.
Using this style in your beading projects adds beauty and a new dimension to the hobby. Learning this stitch opens up a world of creative possibilities in beadwork.
The Charm of Seed Beads in Cellini Spiral Jewelry
Seed beads are key in making intricate designs like the Cellini Spiral Stitch. They come in many colors and sizes, with size 11 toho being a favorite. This size is loved for its uniform shape and wide range of colors.
This section talks about picking the right bead sizes and mixing colors. It shows how to make designs that look good and are well-made.
Choosing the Right Bead Sizes for Your Design
Choosing the right bead size is crucial for your Cellini Spiral jewelry. Size 11 toho beads are top picks because they cut well and look even. They’re not too big for detailed spirals and match well with other parts.
Mixing Colors and Materials for Stunning Effects
A great color scheme can turn a simple bead pattern into a stunning piece of jewelry. Using a mix of matte and shiny finishes adds depth. Playing with light and dark colors also brings interest.
Trying different seed bead types, like toho, leads to new and exciting designs. The trick is to not overdo it. Instead, choose colors wisely and balance bead sizes to enhance the design.
Tools and Materials You’ll Need to Make a Flat Cellini Spiral
Starting your Flat Cellini Spiral project needs more than just excitement. You need the right tools and materials for a beautiful finish. Here’s a detailed list for both new and experienced beaders. Make sure you have these essential items:
- Seed Beads: These are key for any beading project. The right seed beads can change how your design looks and feels. Choose high-quality glass beads for lasting beauty.
- Beading Needle: Pick a needle that matches your beads for easy threading.
- Beading Thread: A strong thread is crucial for your beadwork’s durability. Nylon threads are great because they don’t break easily.
- Scissors: Use them for clean cuts on your thread, making your beadwork look neat.
- Bead Mat: It keeps your beads from rolling away and helps you stay organised.
For a better understanding, watching a good video on making a Flat Cellini Spiral can be very helpful. Many beading patterns are shown in videos, helping you see how to do it.
| Item | Purpose | Recommended Brand |
|---|---|---|
| Seed Beads | Core element of beading | Miyuki or Toho |
| Beading Thread | Provides structure and durability | Nymo or FireLine |
| Beading Needle | Essential for bead threading | Tulip or John James |
| Beading Mat | Secures beads in place | Beadsmith or Beadalon |
| Scissors | Needed for cutting thread | Fiskars or Gingher |
Choosing the right material, from simple beads to strong thread, is crucial. It affects how well your Cellini Spiral turns out. Make sure each part fits your project for a fun beading experience.
Step-by-Step Tutorial for Flat Cellini Spiral Stitch
If you want to learn the flat Cellini spiral stitch, this guide will help. It’s perfect for beginners or those looking to improve. You’ll learn how to make a beautiful piece of beadwork.
To start, make sure you have the right tools and materials. You’ll need seed beads, a thread, and a needle. The pattern you choose will affect your final piece.
- Preparation: First, gather all your materials and tools. This step is key to avoid any delays.
- Threading the Needle: Cut 1.5 meters of thread and thread your needle. A longer thread means fewer additions, keeping tension steady.
- Adding Beads: Begin by adding beads as your pattern shows. This tutorial uses a simple colour pattern for clarity.
- The Stitch Process: Use the spiral stitch technique. Thread through beads to build the spiral’s form and structure.
- Building Layers: Add more layers by following the same bead sequence. Make sure each layer is tight and aligned with the last.
- Finishing Off: When you’re done, weave the thread back through previous rows to secure it. Then, cut off any extra thread.
If you prefer watching, video tutorials on the flat Cellini spiral stitch are great. They offer real-time demonstrations, helping you grasp each step.
| Step | Detail | Tips |
|---|---|---|
| 1. Prepare materials | Gather all necessary beads and tools. | Check twice to ensure no materials are missing. |
| 2. Thread needle | Start with a long piece of thread. | Longer threads help prevent adding additional threads. |
| 3. Add beads | Follow the pattern layout from your design. | Stick to the colour pattern for visual guidance. |
| 4. Start stitching | Begin the spiral weaving process. | Keep tension consistent for even spirals. |
| 5. Add layers | Continue adding beads in sequence. | Ensure alignment with each new layer. |
| 6. Finish off | Secure the thread by weaving it back through. | Make several passes to ensure the thread is secure. |
By following this easy tutorial, even beginners can master the flat Cellini spiral stitch. With practice, your beadwork will improve, showing off your growing skills.
Perfecting Tension in Flat Cellini Spiral Beading
Getting the tension right is key when working with seed beads in a Flat Cellini Spiral Stitch. The right tension makes your beadwork look good and stay strong. Here are some tips to help you keep the tension right and tight in your beading project.
- Start with consistent threading: Always use the same amount of force when pulling the thread through the beads.
- Check tension regularly: Pause often to see if the seed beads are too loose or too tight, and adjust as needed.
- Use the pinch test: Gently pinch your beadwork between your fingers. If the beads move or the thread loosens, increase the tension.
- Maintain even pressure: Try to apply consistent pressure as you pull the thread, so each bead sits snugly next to the others.
Knowing how different tensions affect your beaded pieces can help you make more polished and durable designs. Here’s a guide to show you why keeping the right tension is important.
| Tension Level | Effect on Beadwork | Recommended Action |
|---|---|---|
| Too Loose | Beadwork looks limp and might fall apart. | Increase tension; use shorter thread lengths. |
| Correct | Beadwork is firm and keeps its shape well. | Maintain current technique. |
| Too Tight | Thread may snap, and beadwork feels stiff. | Decrease tension; use thicker or more durable thread. |
Remember these tips and practice often. Soon, keeping the right tension will become second nature in your beading. Happy beading!
The Role of Thread Selection in Beadwork
Choosing the right thread for your beadwork is key. It affects the final look and your beading experience. Knowing the differences between threads is essential.
Comparing Fireline and Other Popular Thread Types
The thread you pick can change how easy it is to thread beads. It also affects the piece’s durability and appearance. Fireline is a top choice, especially for strong projects like even count peyote. Let’s look at how Fireline compares to other threads.
| Thread Type | Strength | Flexibility | Best for |
|---|---|---|---|
| Fireline | Very High | Medium | Peyote, Loom Work |
| Nymo | Medium | High | Seed Beads |
| Silamide | Low | High | Detailed Embroidery |
| K.O. Thread | Medium | Medium | General Beading |
Tips for Preventing Tangles and Knots
Tangles and knots can be a pain in beadwork. Here are some tips to make threading easier:
- Condition the Thread: Use beeswax or a thread conditioner to make your thread smooth. This helps prevent tangling.
- Choose the Right Needle: Pick a needle that matches your thread’s thickness. This makes threading beads easier.
- Maintain Tension: Keep your thread tension even. This stops loops and knots from forming.
- Limit Thread Length: Working with shorter thread makes it easier to manage. It also cuts down on tangling.
These tips help both new and experienced beaders work with threads better.
Exploring Patterns and Bracelet Designs
The world of flat Cellini spiral stitch is full of patterns and bracelet designs. It’s perfect for both beginners and experts. This technique lets you create many different looks, making it great for personalising your jewellery. You can go from simple to complex, and this section will help you on your journey.
Changing the size, colour, and type of beads can turn a basic flat Cellini spiral into something special. Here are some popular ways to make it your own.
- The Classic Mono – A single colour scheme that emphasises elegant, understated beauty.
- The Gradient Effect – A seamless flow from one shade to another, offering a sophisticated ombre appearance.
- The Peppy Polychrome – A vibrant mix of colours for a bolder, eye-catching accessory.
- The Metallic Twist – Incorporation of metallic beads for a sleek, modern look.
The flat Cellini spiral can also be mixed with other techniques. This makes it even more unique. Adding bead loom weaving or charms can make your bracelet stand out.
| Technique | Style Impact | Complexity Level |
|---|---|---|
| Adding Charms | Personal signature touch | Low |
| Loom Weaving | Textured depth | Medium |
| Spacer Integration | Distinctive segmentation | Low to Medium |
The flat Cellini spiral stitch opens up a world of possibilities in bracelet making. It’s exciting and lets you be creative. Each design not only looks different but also tells a story, making your bracelet special.
Variations on the Traditional Flat Cellini Spiral
The traditional Flat Cellini Spiral is a canvas for creativity in beadwork. This section looks at variations that mix tradition with modern twists. These changes make stunning spiral bracelets.
Adding the peyote stitch to the traditional design is a hit. It brings texture and depth to the bracelet. Using superduos is another way to add dimension. These beads make the bracelet look richer without losing the spiral’s essence.
Here’s a comparison of traditional and modern Flat Cellini Spirals. It shows how different techniques and materials change the bracelet’s look and style.
| Technique | Material Used | Visual Effect | Complexity Level |
|---|---|---|---|
| Traditional Flat Cellini | Standard Seed Beads | Elegant, Uniform Swirls | Beginner |
| Peyote Stitch Variation | Seed Beads + Cylinder Beads | Textured, Multilayered Spiral | Intermediate |
| Superduos Integration | Superduos + Seed Beads | Bold, 3D Effect | Advanced |
Trying out these variations opens up new possibilities in beadwork. It lets artists make spiral bracelets that are truly their own. Whether you prefer the classic look or explore new techniques, each method lets you show your creativity.
Adding Clasps and Finishing Touches to Your Jewelry
The final stage of making your beaded masterpiece is crucial – choosing and adding clasps and finishing touches. These parts are key for your jewelry’s function and look. A well-chosen clasp can enhance your design, making it complete and polished.
When picking a clasp, think about its style, ease of use, and durability. For example, a magnetic clasp is great for its convenience and sleek look. A ring clasp is perfect for finer pieces, offering a secure and subtle closure.
When you’re almost done, focus on these finishing touches. It’s not just about matching the clasp to your work. Make sure all ends are secure and the beading looks even. A good finish can turn your project into a piece of jewelry that stands out.
FAQ
Q: What makes the flat Cellini spiral stitch a good choice for beginners?
A: The flat Cellini spiral stitch is easy to learn and fun to do. It’s perfect for beginners because it’s simple and has a clear pattern. This makes it easy to learn and creates beautiful jewellery.
Q: Can I use any size of seed beads for the flat Cellini spiral stitch?
A: You can use different sizes of seed beads to make your design unique. Size 11 beads are common, but you can mix sizes for texture. It’s important to know how the sizes work together to keep your design looking good.
Q: What are some common issues with tension in beading, and how can I avoid them?
A: Tension is important to keep your beading project looking right. If it’s too loose, your beads might not stay in place. If it’s too tight, your thread could break. Try to keep your tension even and moderate. Practice and patience will help you get it right.
Q: What are the benefits of using Fireline thread for beading?
A: Fireline thread is strong and doesn’t fray. It also helps you control the tension well. Its thin size lets you pass it through beads easily, which is great for detailed designs like the flat Cellini spiral.
Q: I’m struggling with thread tangling while beading. Do you have any tips?
A: To avoid tangling, start with a short thread and add more as you go. You can also use beeswax or a thread conditioner to help. Remember to untwist your thread often as you work.
Q: How do I incorporate a clasp into my flat Cellini spiral bracelet?
A: Adding a clasp is the last step. You can weave it in or use a jump ring. Make sure the clasp is secure and fits with your design for a neat finish.
Q: Are there video tutorials available for learning the flat Cellini spiral stitch?
A: Yes! Video tutorials are great for those who learn better by watching. They show you how to do it step by step. You can find lots of videos on YouTube and beading websites for all skill levels.
Q: Where can I find patterns for the flat Cellini spiral stitch?
A: You can find patterns online on beading forums, websites, and craft marketplaces. Look for specific designs or tutorials to find lots of inspiration.
Q: Is it possible to mix different beading stitches within the same project?
A: Absolutely! Mixing stitches can make your designs more interesting. You can add peyote or herringbone stitches to a flat Cellini spiral. This adds depth and beauty to your jewellery.
Q: How do I know which colour scheme to choose for my beadwork?
A: Choosing colours is up to you, but you can be inspired by nature, art, or fashion. Use the colour wheel to find colours that go well together. Don’t be afraid to try new combinations and see what you like!
Q: What is the Flat Cellini Spiral Stitch?
A: The Flat Cellini Spiral Stitch is a beading technique that creates a beautiful, undulating pattern. It is fun to make and suitable for beaders of all skill levels, including beginners.
Q: Where can I find beading patterns for the Flat Cellini Spiral Stitch?
A: You can find various beading patterns available for download on our website. Please note that these patterns may include detailed descriptions and instructions to help you successfully complete your projects.
Q: How do I download the beading patterns?
A: To download the beading patterns, simply click on the desired pattern in the cart and follow the prompts to complete your purchase. Once you’ve completed the transaction, you will receive a link to download the pattern.
Q: What materials do I need for the Flat Cellini Spiral Stitch?
A: You will need delica beads, a needle, and thread. The size 8 beads are commonly used, but you can vary the size based on your project. Be sure to pick up the same bead size throughout the process for a uniform look.
Q: Can I use this technique to create a bangle or necklace?
A: Yes, you can use the Flat Cellini Spiral Stitch to create a variety of items, including bangles and necklaces. The technique allows for versatility in design, so feel free to alter the patterns as needed.
Q: Is there an online class available for learning this technique?
A: Yes, we offer an online class that explains the Flat Cellini Spiral Stitch in detail. We’ll do our best to help you master this technique through step-by-step instructions and video tutorials.
Q: What if I have a question or need assistance with the technique?
A: If you have any questions or need assistance, please contact us. We’re here to help and can provide guidance on how to best implement the technique in your projects.
Q: Are there any tips for beginners trying this stitch for the first time?
A: For beginners, it’s best to practice carefully and follow the pattern’s description closely. Start with a simple project and gradually work your way up to more complex designs. Remember, it’s very easy once you get the hang of it!
Q: What is the process to print the patterns I download?
A: After you download the patterns, you can print them directly from your computer. Simply open the file and select the print feature to get a hard copy that you can use while beading.