Brick stitch is a special way to make beaded jewelry. It turns seed beads into beautiful pieces. This technique is known for its lasting quality and flexibility. It lets people make detailed, textured jewelry that shows off their style and creativity.
We’re going to explore brick stitch beadwork together. We’ll see why it’s so charming and what skills you need to get good at it.
By Artist: Corinne Howe
Key Takeaways
- Brick stitch is a versatile bead weaving technique perfect for creating durable and intricate beaded jewelry.
- The method involves transforming simple seed beads into detailed, textured pieces.
- Brick stitch beadwork is a popular choice among artisans and hobbyists for its aesthetic appeal and ease of learning.
- The technique enhances personal style and creativity in jewelry making.
- This introduction sets the stage for mastering brick stitch, from essential tools and basic techniques to advanced patterns and projects.
Introduction to Brick Stitch
The basic brick stitch is a key technique in bead weaving. It’s known for its strength and flexibility. By interlocking beads, you can make intricate jewelry pieces.
What is Brick Stitch?
The brick stitch is a type of bead weaving. It looks like a brick wall in pattern and stability. To do it, beads are placed in rows, with each bead between two below it. This makes a strong yet flexible fabric for jewelry like earrings and bracelets.
History and Origins
The brick stitch comes from indigenous tribes in North America. They used it for jewelry that was decorative and ceremonial. Over time, it spread to other cultures. People loved it for its strength and the detailed patterns it allowed.
Why Choose Brick Stitch for Beaded Jewelry?
Choosing brick stitch for your beadwork has many benefits.
- Durability: It’s very sturdy thanks to the interlocking beads.
- Flexibility: It’s great for making custom shapes and designs.
- Versatility: It works with many bead sizes and types, from small seed beads to special ones.
It’s also good for both new and experienced beaders. This makes it a versatile choice in beading and jewelry-making.
Essential Tools and Materials
Starting with beaded jewelry requires knowing the essential tools and materials. I’ll help you with the basics.
First, you need the right bead weaving tools. These include pliers, bead boards, and ways to store beads. Each tool is key to making beading fun and smooth.
Choosing the right thread is very important. Nymo and FireLine are top picks because they’re strong and last long. They keep your beading work together, even with different beading patterns. Waxing your thread helps with smooth stitching and avoids tangles.
Your needle should be fine but strong for going through small seed beads. Tulip and John James make great needles that are popular among beaders. They’re durable and easy to use.
Lastly, picking the right beads makes your projects look good and last longer. Seed beads come in many colors and finishes. Matsuno and Miyuki Delica beads are top choices for their quality and consistency.
In short, starting with the right bead weaving tools, thread, needle, and beads leads to creativity and success in beading.
Basic Brick Stitch Technique
Starting your first brick stitch project? Let’s explore the key steps, like starting with the ladder stitch, adding rows, and finishing right. This guide will help you through each step smoothly.
Starting with Ladder Stitch
The ladder stitch is crucial to begin with; it lays the strong base for your project. Here’s how to do it:
- Thread your needle with a sturdy beading thread.
- Pick up two beads and pass the needle back through the first bead from the opposite direction.
- Pull the thread tight to align the two beads side-by-side.
- Continue adding beads one by one, looping the thread back through the previous bead each time to create a ‘ladder’ effect.
Adding Rows
After your ladder stitch base is set, it’s time to add rows. Here’s how:
- Pick up two beads and pass your needle under the thread bridge between the first and second beads of the ladder stitch.
- Pull the thread through and secure the bead by passing back through the second bead.
- Continue this process, adding one bead at a time while anchoring each new bead by passing the needle under the thread bridge in the preceding row.
- Ensure each bead sits comfortably next to its neighbor to create a seamless and uniform row.
Keeping tension even while adding rows is key for a professional look.
Finishing Techniques
Once you’ve finished the main part it is important to finish of your beadwork correctly.
- Weave your thread back through several beads in the last few rows to secure it firmly.
- Use knots sparingly, opting instead to pass the needle through multiple beads to camouflage the thread tail.
- Trim any excess thread close to the beadwork to avoid fraying.
- For added security, reinforce the edges by passing the needle through the outermost beads once more.
These finishing steps not only add strength but also give your piece a sleek finish.
With a full grasp of the basic technique, you’re set to make beautiful beaded jewelry with ease.
Step-by-Step Tutorial
Starting your brick stitch journey? It’s crucial to have clear instructions. This guide will walk you through the key steps. From preparing your thread and needle to adding rows, we’ve got you covered.
Step One: Preparing Your Needle and Thread
Begin with the basics of thread and needle prep for a successful project. Choose a beading needle and quality thread. Make sure the thread is long enough for your pattern.
- Cut a length of thread approximately 6 feet long.
- Thread your needle, leaving a 10-inch tail.
- Double-check for any knots or tangles before proceeding.
Step Two: Creating the First Row
Now, prep your needle and thread. The first row of your pattern starts here. You’ll use the ladder stitch to connect the beads.
- Pick up two beads and let them fall to the base of the thread.
- Stitch back through the first bead, then the second, creating a stable ladder.
- Continue adding beads one by one, repeating the stitching process to form a solid base row.
Continuing Rows in Brick Stitch
After the first row, you can add more rows. This will help your design grow. Each row adds more beads, shaping your pattern.
- Pick up one bead and thread the needle under the thread bridge between the first two beads of the previous row.
- Pull the thread tight and pass the needle back up through the bead you just added.
- Repeat this process, ensuring each new bead is attached securely to achieve the correct tension.
Here’s a table that shows common issues and how to fix them:
| Issue | Solution |
|---|---|
| Loose tension | Ensure the thread is snug after adding each bead. |
| Misaligned beads | Double-check stitch placement and consistency in each row. |
| Thread tangles | Use a thread conditioner or beeswax to minimize tangling. |
Common Mistakes and How to Avoid Them
Exploring brick stitch, I’ve found a few common mistakes that can affect your beadwork. Knowing these mistakes and how to avoid them can greatly improve your skills.
Incorrect Tension
Many beginners struggle with maintaining tension in beadwork. This can make your design look distorted. It’s important to keep the tension even. Check your work often and adjust the thread as needed.
Don’t rush. Take your time to keep the tension consistent. This is key in bead-weaving techniques.
Choosing the Wrong Beads
Choosing the right beads is crucial. The wrong beads can lead to uneven rows or gaps. Use high-quality beads for a professional look.
I like Miyuki or Toho beads for their consistency. Trying different beads and paying attention to color and texture can greatly improve your projects.
Skipping Steps in the Process
It’s easy to skip steps when you’re excited to finish. But every step is important. Skipping steps can ruin the stability and look of your work.
Follow a detailed tutorial or guide to keep track of each step in bead-weaving techniques. Completing each step carefully makes your beadwork stronger and more beautiful.
By focusing on maintaining tension in beadwork, choosing the right beads, and following all steps, you can avoid common mistakes. This will help you improve your creations.
Advanced Techniques
Exploring advanced beadwork can boost your skills in making jewelry. Trying out different stitch variations is a fun way to challenge yourself. These methods add complexity and make your designs stand out.
To get better at these advanced techniques, you need to learn several things:
- Incorporating Different Bead Sizes and Shapes
- Adding Intricate Patterns and Layers
- Utilizing Advanced Stitching Techniques
Using beads of different sizes and shapes can make your designs more interesting. Switching between small and large beads adds texture and depth. This is a key part of advanced beadwork, helping you go beyond the basics of any stitch you learn.
By Artist: Corinne Howe
To add more detail, try using *multiple colors and bead types*. Play with different variations like chevron or zigzag patterns. These patterns make your designs look more detailed and structured, turning a simple piece into something special.
Using advanced stitching techniques like “two drop brick stitch” can also improve your work. This method uses two needles at once, making your piece stronger and more flexible. It’s great for making larger, more durable jewelry.
In advanced beadwork, your creativity knows no bounds. Mastering this step will help you when starting to explore other stitches such as Peyote for example and many more.
Popular Patterns
Adding to your skills can make your beaded jewelry truly stand out. You can explore geometric, floral, and animal motifs. Each style offers a unique way to express your creativity.
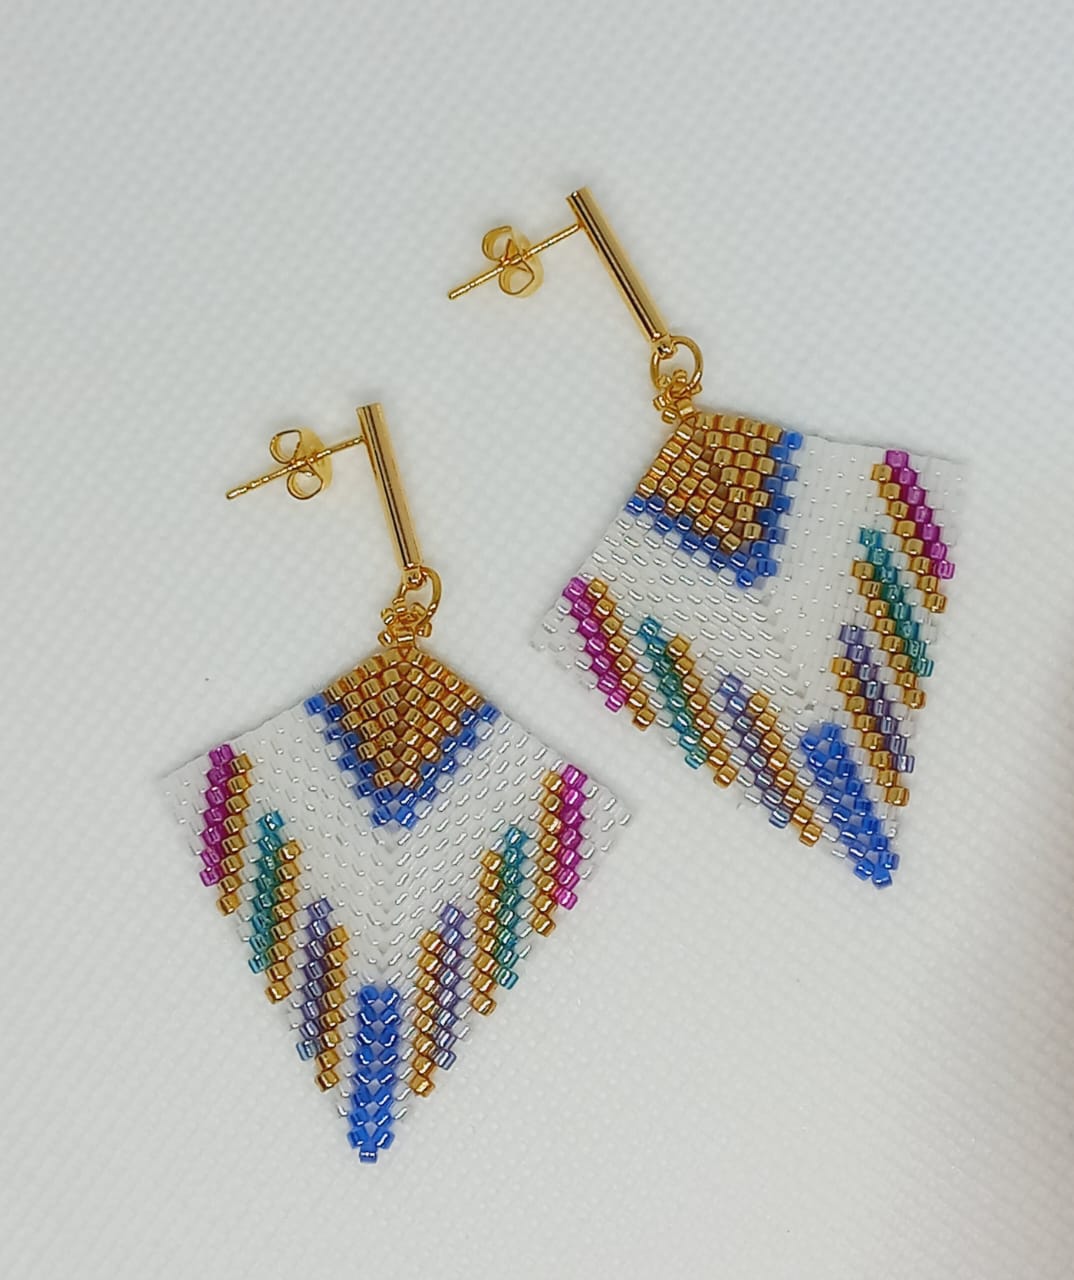
Geometric Designs
Geometric beadwork is a classic in brick stitch. It uses symmetrical shapes and patterns. This makes the designs modern and eye-catching.
- Triangles: Great for earrings and pendants, triangles can be arranged in many ways.
- Hexagons: These shapes let you create detailed and intricate designs.
- Abstract patterns: Go wild with shapes and colors to express yourself.
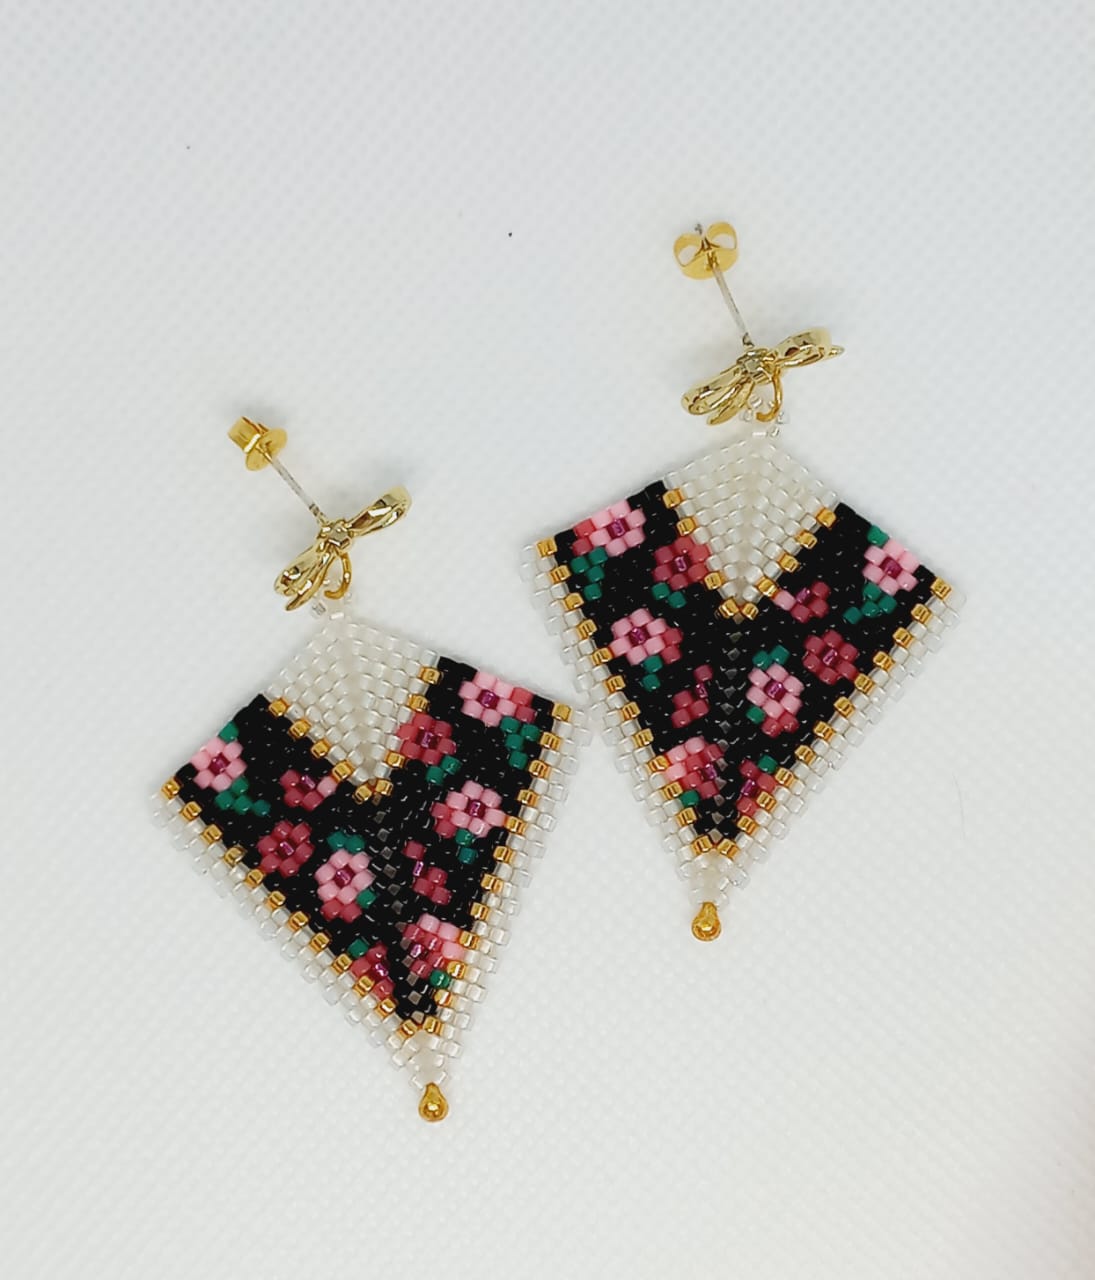
Floral Patterns
Floral beadwork adds a natural touch to your jewelry. It’s perfect for spring and summer. You can keep it simple or go all out with details.
- Simple blooms: Add tiny, colorful flowers to bracelets or necklaces.
- Detailed petals: Make realistic roses, daisies, and other flowers.
- Botanical motifs: Combine flowers with leaves and stems for a full look.
Animal Motifs
Animal beadwork lets you show off your love for wildlife in your jewelry. These designs are fun and complex. They capture the spirit of your favorite animals.
- Birds: From small songbirds to big eagles, add bird beauty to your jewelry.
- Insects: Delicate butterflies and dragonflies add a playful touch.
- Mammals: Roaring lions or cute kittens can make your jewelry stand out.
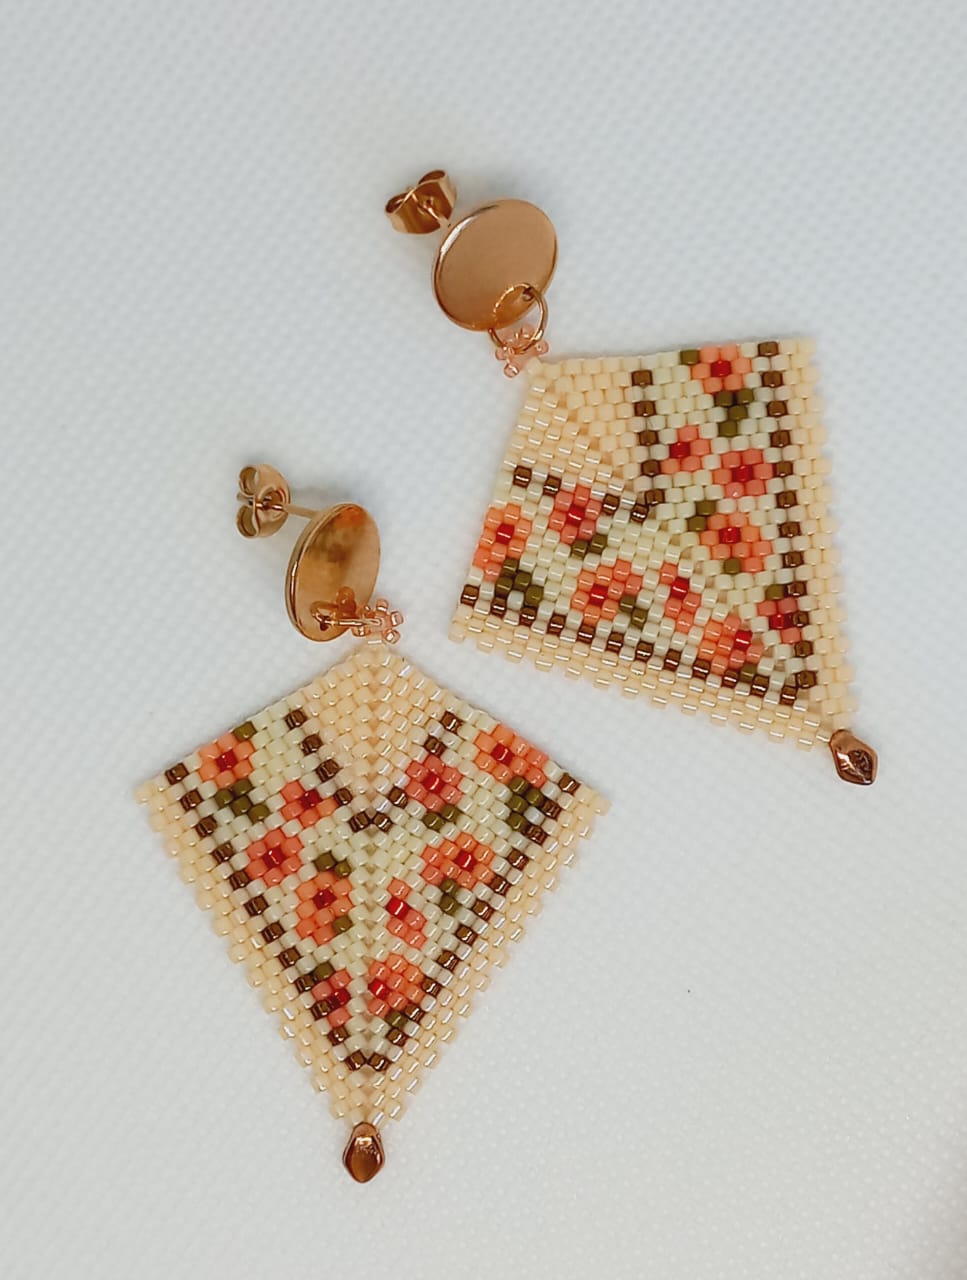
Creating Brick Stitch Earrings
Making your own handmade beaded earrings with this stitch is rewarding.
By Artist: Corinne Howe
Begin with a simple yet elegant design. Think about the weight, size, and balance of your earrings. These things affect how they look and how comfortable they are to wear.
- Gather Your Materials: You’ll need seed beads, a needle, beading thread, earring hooks, and a beading mat.
- Design The Pattern: Draw a pattern or use one you like. Make sure it’s even to look good.
- Start With Ladder Stitch: This step creates the base of your earring, keeping it stable.
- Add Rows: Add one row at a time, keeping the tension even.
- Finish and Attach: Tie off the threads and attach the earring hooks to finish your earrings.
When making handmade beaded earrings, keep them symmetrical. A balanced design makes them look good and feel comfortable. Focus on the pattern and size, making sure each row matches up perfectly.
The earrings’ weight is also important. They should not be too heavy or too light. The right balance makes them both stylish and comfortable to wear.
| Consideration | Importance | Tips |
|---|---|---|
| Weight | High | Use lightweight beads like Delicas for comfort. |
| Size | Medium | Small to medium size for everyday wear; large for a bold look. |
| Symmetry | High | Keep the pattern the same on both earrings. |
By using this brick stitch earring tutorial, you’ll become a pro at DIY jewelry. You’ll make beautiful earrings and appreciate the effort that goes into each piece.
Making Bracelets
Making beaded bracelets is fun and rewarding. It’s great for both beginners and pros in jewelry making. You can show off your style and creativity with custom beaded bracelets. Paying attention to bead choice and adding clasps makes your bracelet special.
Choosing the Right Beads
Choosing the right beads is key for a great bracelet. Pick beads that look good together and fit your design. Delica beads are great for a neat look. Mixing different bead sizes and types adds texture and interest.
Designing Your Bracelet
There are so many ways to design a bracelet. You can sketch your idea or use software for complex patterns. Think about colors and themes that show your style. Geometric, floral, or abstract patterns can make your bracelet stand out.
Adding Clasps and Finishing Touches
Adding clasps is a crucial step. Choose ones that match your bracelet’s look and make sure they’re secure. Use bead tips or crimp beads to finish the thread ends. Check your bracelet for loose threads or beads before you’re done.
| Bead Type | Advantages | Recommended Use |
|---|---|---|
| Delica Beads | Uniform Shape, Smooth Finish | Brick Stitch Bracelets |
| Seed Beads | Versatile, Various Sizes | Filler Beads |
| Crystals | High Sparkle, Elegance | Accents |
Working with Different Bead Sizes and Shapes
In the world of brick stitch, the variety of bead sizes and shapes is key to making unique designs. Knowing how to use these differences can take your beadwork to the next level. Let’s explore how to work with these variations.
Using different bead sizes changes how your project looks. Big beads make your designs stand out but keep them simple. Small beads let you create detailed patterns. It’s important to adjust your technique for the beads you use to make your project look correct as per the pattern.
Choosing the right bead shapes is also crucial. Beads come in shapes like cylindrical, round, or even unique ones. Cylindrical beads, like Miyuki Delicas, give a uniform look that’s great for precise patterns. Round beads, such as Czech glass, add a softer, more natural feel.
For versatile beadwork, mix different bead sizes and shapes in your designs. This adds visual interest and lets you express your creativity. As you try out these elements, remember to adjust your thread tension and pay attention to how different beads work together in the pattern.
| Bead Type | Characteristics | Best Use Cases |
|---|---|---|
| Miyuki Delicas | Uniform, cylindrical | Precision patterns |
| Czech Glass | Round, varied sizes | Softer, organic designs |
| Long Magatamas | Drop-shaped, textured | Embossed and textured effects |
Mastering brick stitch with various bead sizes and shapes takes practice and trying new things. By using the wide range of beads out there, you can make beadwork that really stands out.
Troubleshooting Common Issues
Brick stitch can be very rewarding, but it has its challenges. Here are some tips to keep your work looking great.
Loose Beads
It’s important to fix loose beads to keep your work secure. A single loose bead can mess up the whole pattern. Make sure to pull the thread tight after each bead to keep everything in place.
If a bead comes loose after you’re done, you can fix it. Just weave a new thread through the beads around it and pull it tight.
Twisted Thread
Dealing with twisted thread is key to a neat design. Twisted thread can cause uneven tension and mistakes. Let your needle hang sometimes to let the thread untwist naturally.
If you find a twist, just run your fingers along the thread to fix it. This keeps your work looking smooth.
Repairs and Maintenance
Keeping up with beadwork maintenance makes your pieces last longer. Check your jewelry often for any damage or wear. Fix any weak spots or loose beads right away.
Store your beadwork in a cool, dry place to protect it. Use a jewelry box or fabric pouch for delicate items.
Conclusion
My journey with brick stitch bead weaving has been full of creativity. I’ve learned from the basics to advanced patterns. Each step has let me express myself in new ways.
With the right tools and materials, you can make many types of beaded jewelry. This includes simple earrings or complex bracelets. Mastering the basics helps you improve your beading projects.
Every mistake is a chance to learn and grow. It helps you push your creativity further. Keep practicing and you’ll see brick stitch as a way to express yourself.
Let each project inspire you and let your breakdowns turn into breakthroughs. Let your bead weaving show your unique style and creativity. Happy beading!
FAQ
What is brick stitch?
Brick stitch is a beading technique that makes strong and flexible jewelry. It uses interlocking beads for patterns. This method creates intricate and durable designs.
How do I start with brick stitch?
Start with a ladder stitch base for your brick stitch project. This base is key for building your design. Then, add rows by weaving beads in a specific pattern.
What materials do I need for brick stitch?
You’ll need seed beads, strong thread, beading needles, and sometimes patterns for brick stitch. Tools like thread cutters and bead mats help too. Good quality supplies make your jewelry last longer and look better.
What is the difference between brick stitch and peyote stitch?
Brick stitch and peyote stitch are both beading techniques. But, each is a different technique. Brick stitch overlaps beads, while peyote stitch arranges them differently. Each stitch has its own look for different projects.
How do I add new rows?
To add rows, start with two beads and attach them to the previous row’s loops. Then, add beads one by one, anchoring each through the loops between the earlier beads.
Can I use different bead sizes and shapes in brick stitch?
Yes, brick stitch lets you use various bead sizes and shapes. You might need to adjust the pattern for different beads. This can make your designs unique and eye-catching.
What are some common mistakes in brick stitch?
Mistakes include wrong tension, bad bead choices, and missing steps. Keep tension even, pick the right beads, and follow each step to avoid these issues.
How do I finish a brick stitch piece of jewelry?
Finish by securing your last row and tidying up thread ends. Add clasps or other finishes to complete your piece. Good finishing makes your jewelry durable and attractive.
Where can I find brick stitch patterns?
Look for brick stitch patterns in beading magazines, books, and online. Websites for beadwork often have free and paid patterns. You can also make your own patterns as you get better at it.
What are some advanced brick stitch techniques?
Advanced techniques include beaded fringe, three-dimensional shapes, and layered designs. These add complexity and a unique touch to your jewelry.
How do I fix common issues in brick stitch beadwork?
Fix issues like loose beads and twisted thread by keeping tension right and handling the thread carefully. Check your work often and fix problems quickly. Store your jewelry right and be gentle with it to keep it looking great.